Showing posts with label Knit. Show all posts
Sunday, August 3, 2014
What's in My Yarn Bag
Above are some fun pictures of things I currently carry in my yarn bag (compared to my post last year). I currently carry:
Snip-its (blades are protected and don't stab me when I look for them. LOVE THESE)
Cat tape-measure
Stitch holders & Stitch markers of various sizes
Yarn Notebook for inspiration
All these things easily fit into that cute Lantern Moon pouch that allows me to transport my notions to different project bags with no hassle. So great!
What do you currently carry in your yarn bag?
Sunday, July 13, 2014
Knitted Cotton Top
Saturday, July 5, 2014
Porcupine Sweater
Have you ever seen Kristina McGowan's book More Modern Top-Down Knitting? It's filled with beautiful pictures and chic patterns that I feel are just my style. One garment that particularly caught my attention was the Porcupine Sweater, with its intriguing texture that also looked like a fun piece to knit. I had never knit top-down before so I was also excited to try a new knitting technique.
The piece starts out with provisional cast on, another new technique for me. I started this piece back in March during my blog hiatus and man, has it has been such a great learning experience! I can confidently say that I will try knitting top-down more often because it's much easier to modify to fit my body type and (best thing ever) I get to try the piece on while it's a WIP. So exciting!
Here are my progress pics from my phone/instagram of my first ever top-down sweater!
Yarn: Cascade Venezia
Needles: US 6 circulars
So cool. I LOVE progress pics and watching my piece come to life! I haven't made the sleeves yet because I've been distracted by many other things (blog design, current crochet projects, typical crafty things), but that's fine because the yarn I used is a wool/silk blend. No bueno for summer in the OC. I will most likely finish this baby at the end of the summer so I can remember to wear it during a more appropriate time of the year. ;]
If you've knit anything top-down I'd love to see!
Lisa
Wednesday, January 8, 2014
Promised Pictures Part 4: Other Cool December Projects
Project 1)
This cowl:
This cowl:
Texture detail:
Project 2)
Homespun Boot Socks for boyfriend and me! These will be the first socks I will finish during my knitting career. So excited! I will be using Madelinetosh Merino in the color Thunderstorm
Progress pics:
[camera phone]
Thursday, November 7, 2013
Performing Surgery
I had leftover yarn after I finished my hat that I made on Halloween and thought I could make good use of it by making a headband. Unfortunately I made one teeny tiny mistake and didn't realize it until after I cast off.
Now the mistake sticks out like a sore thumb! I carelessly knit 3 instead of knit1 purl1 knit1. First I thought about embellishing the headband with something that's supposed to look like a flower:
Seriously though, that looks awful. I was too lazy to think of some other kind of embellishment to cover up my mistake and somehow save my headband. So I performed surgery:
Luckily the mistake was about six stitches back from the end of my cast off. I undid my cast off and held stitches on my circulars (stitch holders work fine too) until I reached the column that needed to be fixed. To fix the stitch that is supposed to be in a purl column, I dropped the stitch until I pulled out my mistake and carried the stitch back up by putting a horizontal strand in front of the loop and pulling the strand through the loop from front to back with a crochet hook. I repeated all the way to the top. (To fix a stitch in a knit column, repeat all the steps but put the horizontal strand in back of the loop and pull the strand, from back to front, through the loop using a crochet hook).
TADA! Now the column looks like all purl stitches as it should ez.
I finished casting off:
Thursday, October 31, 2013
Happy Halloween!
I made a quick hat today using Purl Soho Super Soft Merino in Sea Salt and Madelinetosh Light in Calligraphy. Here are progress pics, for your viewing pleasure.
(:
Super soft merino is such a wonderfully soft yarn and it knits up a comfy hat in just a couple short hours. I am so excited to use more of this yarn to make similar hats to the one above. Tis the season!
Hope you all have a wonderful and spooky night tonight!
Tuesday, October 29, 2013
Finished Noro Cowl
Here are pics of my finished cowl!
I wanted the cowl to look like a moebius knitted cowl so I seamed the right side to the wrong side. Ended up looking pretty cool, special thanks to the coloway.
The blue line in the middle is my seam. You can see the wrong side purl rows to the left and the right side knit rows to the right.
Next I'll show you progress of my Link Blanket. Stay tuned!
Sunday, October 27, 2013
Project Update: Noro scarf
I LOVE this scarf. I have been so excited about this yarn and this pattern that I haven't been easily distracted from this project. Good thing it's almost done!
The birth of a scarf:
I just started another project since it's Fall and it's cold as f. I have legitimately decided to make the Link Blanket and have given myself until the end of November to finish it. It'll happen. Can't wait! More details on my blanket later.
Happy Sunday friends!
Thursday, October 17, 2013
Current projects: October 2013
I love to knit and crochet, but sometimes I get distracted and easily excited by multiple projects. I have 4 current projects (although only 1 is "active"). I still have high hopes of finishing all my projects, whenever that may be. Sometime soon, sometime later, it doesn't matter as long as it gets done. I think the best part about knitting and crocheting is when I do finally finish and get to use and show off my piece!
Here are my current "back burner" projects:
1. Woven bag
I'm making many of these squares and will eventually sew them together to make a handbag or a weekend tote. I started this project over a year ago ;)
(Please excuse exploded yarn ball. My cat tried playing with it when I wasn't looking.) I started this project attempting to try something new and different, which at the time meant knitting with needles smaller than a US 6 and yarn that knits up a smaller gauge than worsted weight. I got stuck trying to make the thumb, got distracted, and reverted back to the safe cowls and hats that I love to so dearly make. Since it's getting colder outside, I will most likely finish this project within the next month. I started this project 8ish months ago.
I got distracted with this project because new yarn came in at work and I was way WAY more excited to knit with the super soft Worsted Twist. The yarn in this sweater is made out of acrylic (buhhhhhhh) and wool. It doesn't feel THAT soft and I'm all about the feels, hence the immediate transition to my chevron hat. I started this project 2ish months ago.
Can't wait to show you my progress on my Noro scarf. My cat loves it. I laid my scarf down to take a picture and my cat promptly claimed the scarf as his own. I mean, seriously, look at this cat:
Pretty sure my cat likes the feel of mohair, since this scarf is 45% kid mohair. I'll probably make him some kind of wool mat in the future that he can use for insulation during the cold months to come!
That's all for now friends. Time to get back to knitting my scarf!
Friday, September 27, 2013
Try Number 3: Chevron Hat
1. Long ribbing (used US 6 circulars instead of US 8 like I did for the rest of the hat)
2. Less chevrons
3. Similar top decrease as first revised chevron hat
Here is the finished product!
I'm so happy with the way this hat turned out! So much so that I have actually ripped out a few chevrons of my revised hat to make it look like this one but with the shorter brim. Updates of that soon!
Saturday, September 14, 2013
Last Week Has Been Exciting, To Say The Least
This has been my view for the last week:
I ended up needing two bags of IV fluids without expelling much fluid of my own at the hospital. It was a grand experience.
Contents of this picture include:
- My knitting, gatorade/liquid, saltines, pablo, my bed
I have not moved much from this spot. Why you ask? I had a horrible case of food poisoning which ended up getting me hospitalized with severe dehydration.
I ended up needing two bags of IV fluids without expelling much fluid of my own at the hospital. It was a grand experience.
Anyway it's safe to say that the worst has passed. Time to continue on! I'm thinking I will make that Link blanket I posted about earlier. Can't wait to start that!
Wednesday, September 11, 2013
Updated Chevron Hat
I modified the pattern and this is what I came up with!
Changes:
Changes:
- Ribbing is 2 inches long (next hat I make I will knit 4 inches of ribbing so I can fold the ribbing over)
- 6 rows of color per chevron
- Hat decrease so the top of the hat looks less rectangular and more curved
I will recycle the yarn I used to make my first hat so I can make another hat that looks like this! I am really please with the outcome.
That's all for now friends! I'll post pictures of my current project soon.
Tuesday, August 27, 2013
Quick knit: Chevron Hat
It looks cute but this hat (unfortunately) is way too small to fit my head!
I used this chevron hat pattern (followed it exactly) and Purl Soho's lovely new worsted weight yarn.
Couple of notes:
The ribbing is too short
-I will make the ribbing longer for my next hat
The top of the hat decreases too much too soon, making the hat look all weird and square
-I will modify this to make more of a smoother, less square look
I want thicker chevrons
-I will make 6 row repeats instead of 2 row repeats
I still have plenty of yarn left over to make another hat and will surely make the necessary modifications so I can wear it during the upcoming cold season.
Lovely update picture coming soon!
Saturday, August 10, 2013
Finished Intarsia Experiment
It looks pretty awesome, in my very humble opinion.

Intarsia knitting is not as difficult as I thought it would be. I like how the middle of the headband turned out! I knit with blue on top of grey throughout this whole section and it gave the headband a nice clean look. Intarsia can be pretty tricky though. Check out what the inside looks like:

Notice how the grey stripe rows look different! I am pretty sure this is because I knit with the grey yarn on top of the blue yarn for the first stipe and vice versa for the second stripe.
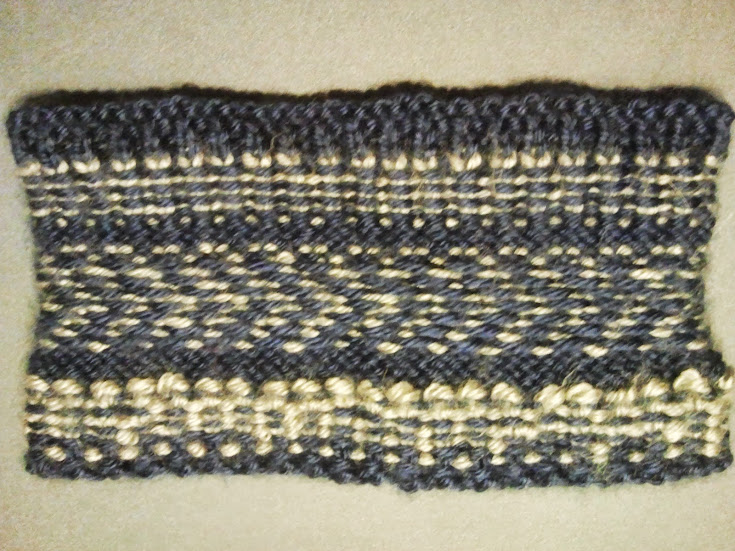
I can't wear this headband though. I cast on 84 stitches and attempted to rib with two colors of yarn, but apparently this destroys the intent of the stitches. This headband is not very elastic so it was sort of a pain to slip onto my tiny head!
Oh well, this was a good learning experience. I am planning on knitting a pixelated link beanie, and now that I have gotten my feet wet, I feel like I will have a good chance at producing something totally awesome.
Here is an update picture of my progress. Too bad knitting in the round produces only a spiral and no seam.
Subscribe to:
Posts (Atom)